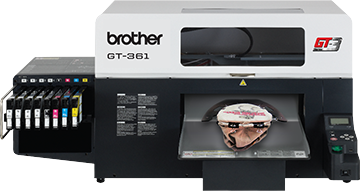
Wiper Cartridge Cleaning on the Brother GT3
customer
The Wiper Cleaner needs to be replaced regularly. Keep the Print Head Cap and Wiper Blade clean when replacing the Wiper Cleaner. If not, the waste ink may drop on a T-shirt in printing or mis-firing may not be easily improved.
(1) With power on, press the platen eject button on the panel.

(2) Select [ Maintenance ] from the menu by pressing Up/Down Buttons and press OK Button.

(3) Select [ Maintenance Parts Exchange ] and press OK Button. The Platen will be loaded and the Wipers will be moved to the cleaning position. Follow the message and turn off the printer.

(4) Open the Front Cover with both hands until it is locked with the stopper.

(5) Locate the wiper cassettes, CMYK in front, White to the rear of the cap rubbers, inside the printer. Cover your right hand with a plastic bag so that you can hold the used Wiper Cleaner safe and clean. Pick the right edge of the Wiper Cleaner and move slightly to the right (1-2 mm) by your right hand, the claw in the right will be released.

(6) Move the Wiper Cleaner slightly to the left (1-2 mm) to release the claw in the left. Pay attention not to tilt the Wiper Cleaner or the waste ink may drop. Keep flat and move slowly.
<Note> Do not tilt the Wiper Cleaner, ink may get on your hands or clothing.

(7) Pick the plastic bag on your right hand with your left hand, and wrap the Wiper Cleaner with the plastic bag.

(8) Remove the wrapper Wiper Cleaner carefully, not to drop waste ink and dispose of in accordance with local regulations.

<Note> Pay attention not to soil the Timing Belt and the other parts with waste ink.
(9) Mount the new Wiper Cleaner by following (6) to (4) in the previous pages.
<Note> Do not give stress to the Timing Belt in mounting the Wiper Cleaner.
(10) If your printer turns on with no errors, replacement of the Wiper Cleaner has been completed successfully.
(11) If something irregular occurs, e.g. abnormal noise or error "No Wiper Cleaner (CMYK/White)", turn off your printer, and check if the Wiper Cleaner is correctly mounted.


