Replacing the Printhead Cable on the DTG M2 and M4 Garment Printer
customer
Buy the Printhead Cable for the DTG M2 and M4 Garment Printer Here!
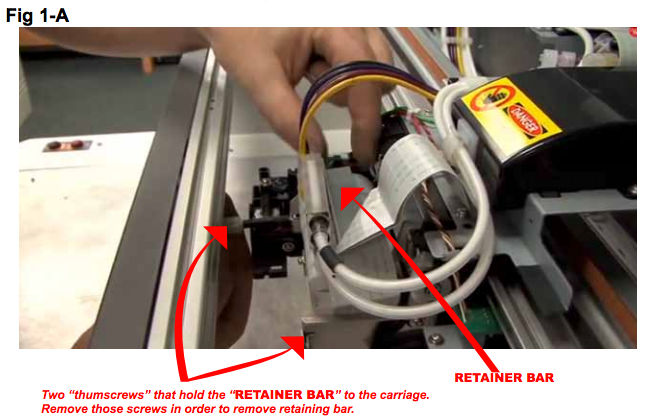
- Release carriage from capping station and roll out to the middle of the printer. (Indicated below 1-A) Place a rag under the area you are working on. Just to catch any ink that might be dropped during the install.
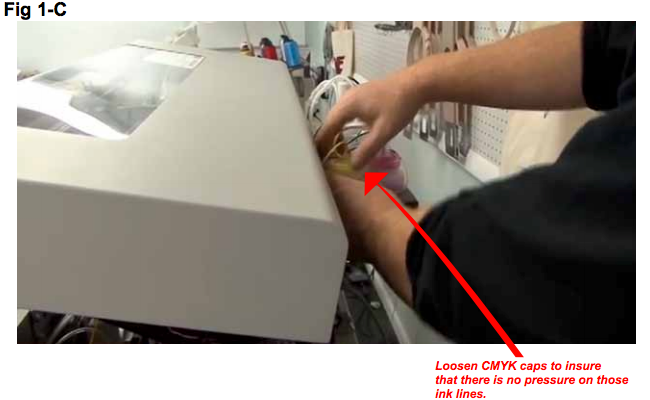
- Release pressure off of the CMYK lines by loosening the caps on the ink bottles. (Indicated on pg.2 Fig. 1-C)
- Unscrew two thumbscrews from carriage (Indicated below 1-A)
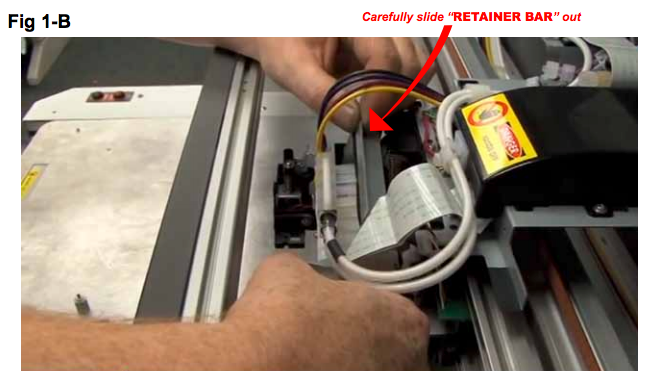
- Carefully slide the “RETAINER BAR” out (indicated previous page 1-B)
- Ensure that the CMYK ink bottles have no pressure by loosening the bottle caps (Indicated below 1-C)
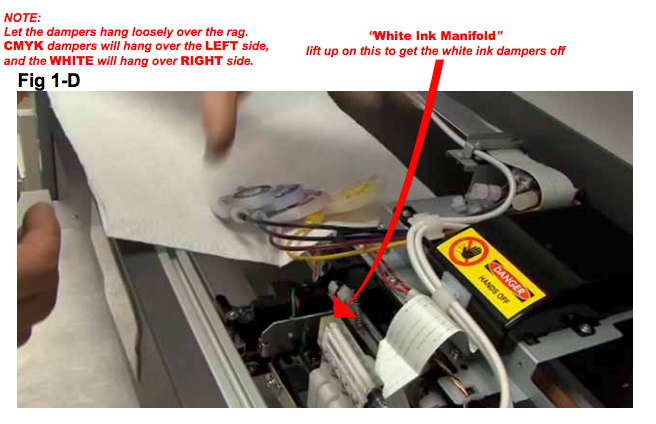
- Pull the CMYK dampers off one at a time. Then pull the white ink dampers out (white ink are all connected through the White Ink Manifold) they will all come out together. (Indicated below 1-D)
- Gently pull the printhead out of the carriage. Be careful where you pull from, it’s best to use the area indicated below. Sometimes it will require both hands to get the head out. Usually pushing back, then lifting up, wiggling the head as you are lifting up. Notice the adjustment screw, this screw has been factory set to keep the printhead tilt correct. We do not want to adjust this screw. It’s best to work around it when replacing the printhead. WARNING: Be careful not to damage the “FACE” of your printhead while installing the new one. NEVER touch the face of the printhead or lay it face down on anything.
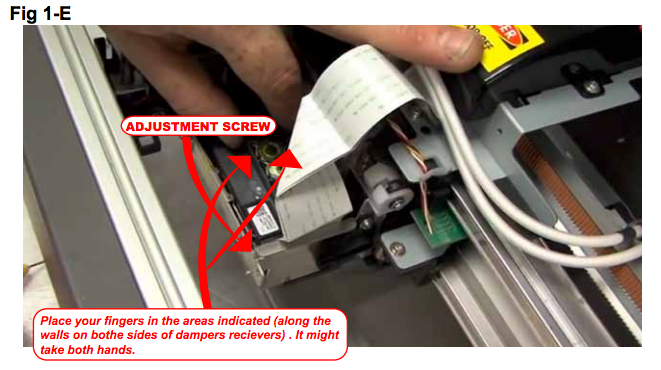
- Pull the FFC cables straight out, be careful not to damage the “Teeth” on the cables. (Indicated in 1-F and 1-G)
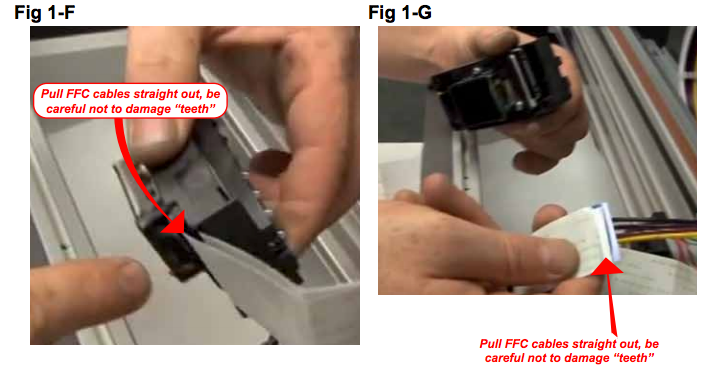
- Notice which direction the cables are facing in relation to each other. The “teeth” (electrical tabs) are facing AWAY from each other. (Indicated below 1-H)
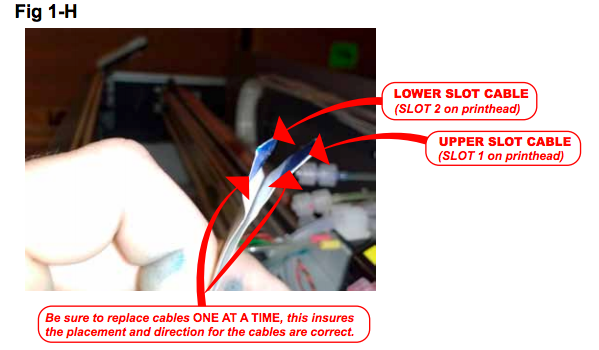
- Remove the black plastic cover (this houses the CR BOARD) (Indicated below 1-I)
- In some cases your NEW FFC cables will not be “PRE-FOLDED” to fit your machine. If your cables are “PRE-FOLDED” move on to step 12. If they ARE NOT “PRE-FOLDED” follow the steps below. Mark your EXISTING cables on the print head end. (Indicated below 1-J), then follow each cable to the CR BOARD and mark it the with corresponding marks on that end. (Indicated below 1-K) Then tape the EXISTING cables together (in this example I am using paper clips to hold the cables together) Remove the cables from the CR BOARD and use them as a template to fold your new cables.
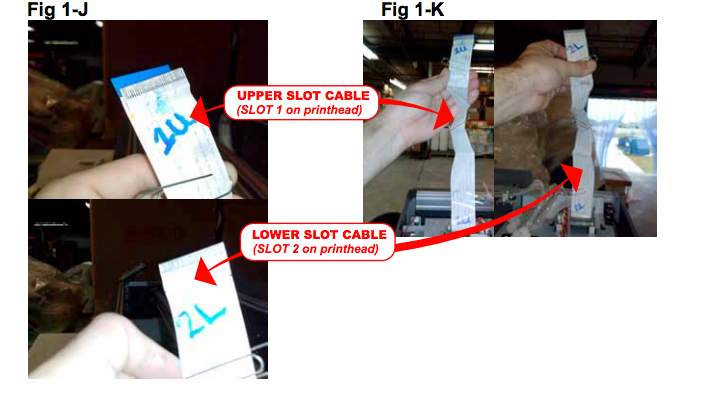
The fold doesn’t have to be an EXACT match, the main goal is to ensure that the cables are plugged in correctly. For example: The “1U” (SLOT 1 UPPER CABLE) is plugged into the corresponding slot on the CR BOARD. If the cables aren’t facing the right direction or the slot on the head or CR BOARD is switched, the printer will error upon startup.
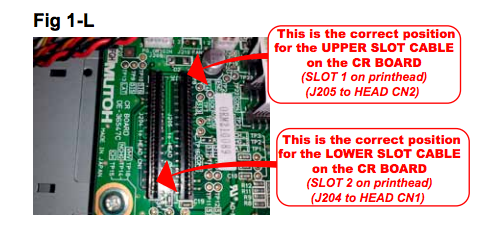
- Gently unplug your existing cables from the CR BOARD. Plug your new cables into the CR BOARD. Be sure the teeth of the cables are facing correct way, start with slot 1. (Indicated below 1-L)
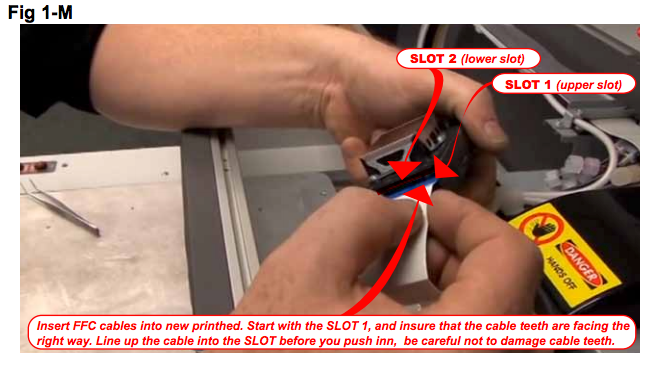
- Connect the FFC cables to your new printhead. Ensure that you are placing the correct cable into the correct slot on the head. Start with Slot one, and then insert slot two. (Indicated below 1-M)
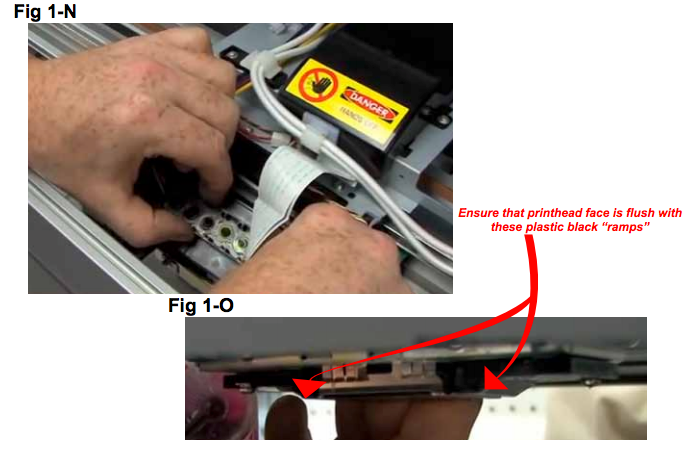
- Carefully reseat the print head back into the carriage. Be careful not to touch or damage the printhead “FACE”, push back on head and wiggle into position. (Indicated below 1-N) Ensure that the head is placed correctly, check that it is FLUSH with black plastic ramps on either side. (Indicated below 1-O)
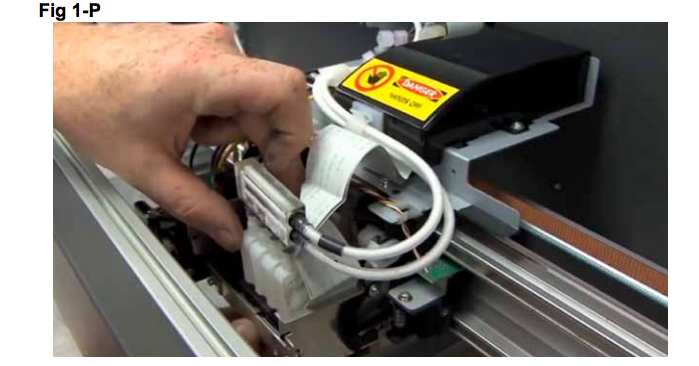
- Carefully re-seat the white dampers first. (Indicated below 1-P)
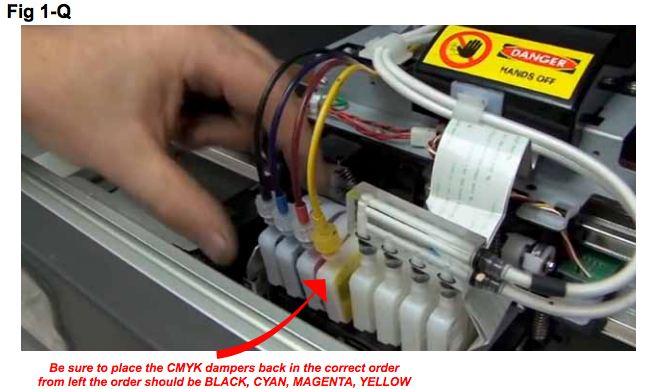
- Re-Seat the CMYK dampers next, be sure to place the colors back into the correct order. (from left the order should be BLACK, CYAN, MAGENTA, YELLOW) (Indicated below 1-Q)
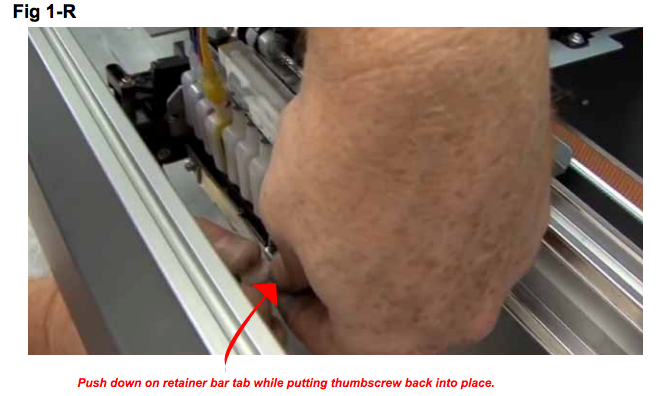
- Re-Seat the retainer bar. Push down on tabs on the reatainer bar as you are putting the thumbscrews back in. This ensures that printhead stays flush with ramps and that dampers are seated correctly. (Indicated below 1-R)
- Re-check printhead and ensure everything is placed correctly. (Check damper order and printhead flush with plastic black ramps)
- After double checking everything, we can dock the carriage back over the capping station, restart the printer, tighten the CMYK bottle caps.
- After double checking everything, we can dock the carriage back over the capping station, restart the printer, tighten the CMYK bottle caps.
- Do a nozzle check, the first one usually comes out a little spotty, at this point you can normally begin printing as usual.

